rongxian
2022. 2. 22. 14:54
특징점 매칭 (Feature Point Matching)
- 두 영상에서 추출한 특정점 기술자를 비교하여 서로 유사한 기술자를 찾는 작업
- 특징점 매칭간 무조건 특징점을 매칭하기에 좋은 특징점 매칭을 찾는 필터링 과정이 필요 (밑에 예시보면 확인 가능)
특징 벡터 유사도 측정 방법
- 실수 특징 벡터: L2 Norm
- 이진 특징 벡터: Hamming Distance
OpenCV 특징점 매칭 클래스
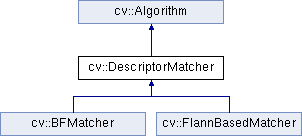
BFMatcher: Brute-Force
FlannBasedMatcher: Fast Library for Approximate Nearest Neighbor (K-D Tree)
특징점 검출 알고리즘 객체 생성
cv2.DescriptorMatcher.match(queryDescriptors, trainDescriptors, mask=None) -> matches- queryDescriptors: (기준 영상 특징점) 질의 기술자 행렬
- trainDescriptors: (대상 영상 특징점) 학습 기술자 행렬
- mask: 매칭 진행 여부를 지정하는 행렬 마스크
- matches: 매칭 결과. cv2.DMatch 객체 리스트
cv2.DescriptorMatcher.knnmatch(queryDescriptors, trainDescriptors, k, mask=None, compactResult=None) -> matches- queryDescriptors: (기준 영상 특징점) 질의 기술자 행렬
- trainDescriptors: (대상 영상 특징점) 학습 기술자 행렬
- k: 질의 기술자에 대해 검출할 매칭 개수
- mask: 매칭 수행 여부를 지정하는 행렬 마스크
- compactResult: mask가 None이 아닐 때 사용되는 파라미터. 기본값은 False. False의 경우 결과matches는 기준 영상 특징점과 같은 크기를 가짐
- matches: 매칭 결과. cv2.DMatch 객체 리스트
특징점 매칭 결과 영상 생성
cv2.drawMatches(img1, keypoints1, img2, keypoints2, matches1to2, outImg, matchColor=None, singlePointColor=None, matchesMask=None, flags=None) -> outImg- img1, keypoints1: 기준 영상과 기준 영상에서 추출한 특징점 정보
- img2, keypoints2: 대상 영상과 대상 영상에서 추출한 특징점 정보
- matches1to2: 매칭 정보. cv2.DMatch의 리스트
- outImg: 출력 영상
- matchColor: 매칭된 특징점과 직선 색상. 기본값으로 두면 랜덤
- singlePointColor: 매칭되지 않은 특징점 색상
- matchesMask: 매칭정보를 선택하여 그릴 때 사용할 마스크
- flags: 매칭 정보 그리기 방법. 기본값은 cv2.DRAW_MATCHES_FLAGS_DEFAUL
예시
import sys
import numpy as np
import cv2
# 영상 불러오기
src1 = cv2.imread('graf1.png', cv2.IMREAD_GRAYSCALE)
src2 = cv2.imread('graf3.png', cv2.IMREAD_GRAYSCALE)
if src1 is None or src2 is None:
print('Image load failed!')
sys.exit()
# 특징점 알고리즘 객체 생성
feature1 = cv2.KAZE_create() # 실수 특징점
feature2 = cv2.AKAZE_create() # 이진 특징점
feature3 = cv2.ORB_create() # 이진 특징점
# 특징점 검출 및 기술자 계산
kp1_1, desc1_1 = feature1.detectAndCompute(src1, None)
kp1_2, desc1_2 = feature1.detectAndCompute(src2, None)
kp2_1, desc2_1 = feature2.detectAndCompute(src1, None)
kp2_2, desc2_2 = feature2.detectAndCompute(src2, None)
kp3_1, desc3_1 = feature3.detectAndCompute(src1, None)
kp3_2, desc3_2 = feature3.detectAndCompute(src2, None)
# 특징점 매칭
matcher1 = cv2.BFMatcher_create(cv2.NORM_L2)
matcher2 = cv2.BFMatcher_create(cv2.NORM_HAMMING)
matches1 = matcher1.match(desc1_1, desc1_2)
matches2 = matcher2.match(desc2_1, desc2_2)
matches3 = matcher2.match(desc3_1, desc3_2)
print("# of kp1_1:", len(kp1_1))
print("# of kp1_2:", len(kp1_2))
print("# of matches1:", len(matches1))
print("# of kp2_1:", len(kp2_1))
print("# of kp2_2:", len(kp2_2))
print("# of matches2:", len(matches2))
print("# of kp3_1:", len(kp3_1))
print("# of kp3_2:", len(kp3_2))
print("# of matches2:", len(matches3))
# 특징점 매칭 결과 영상 생성
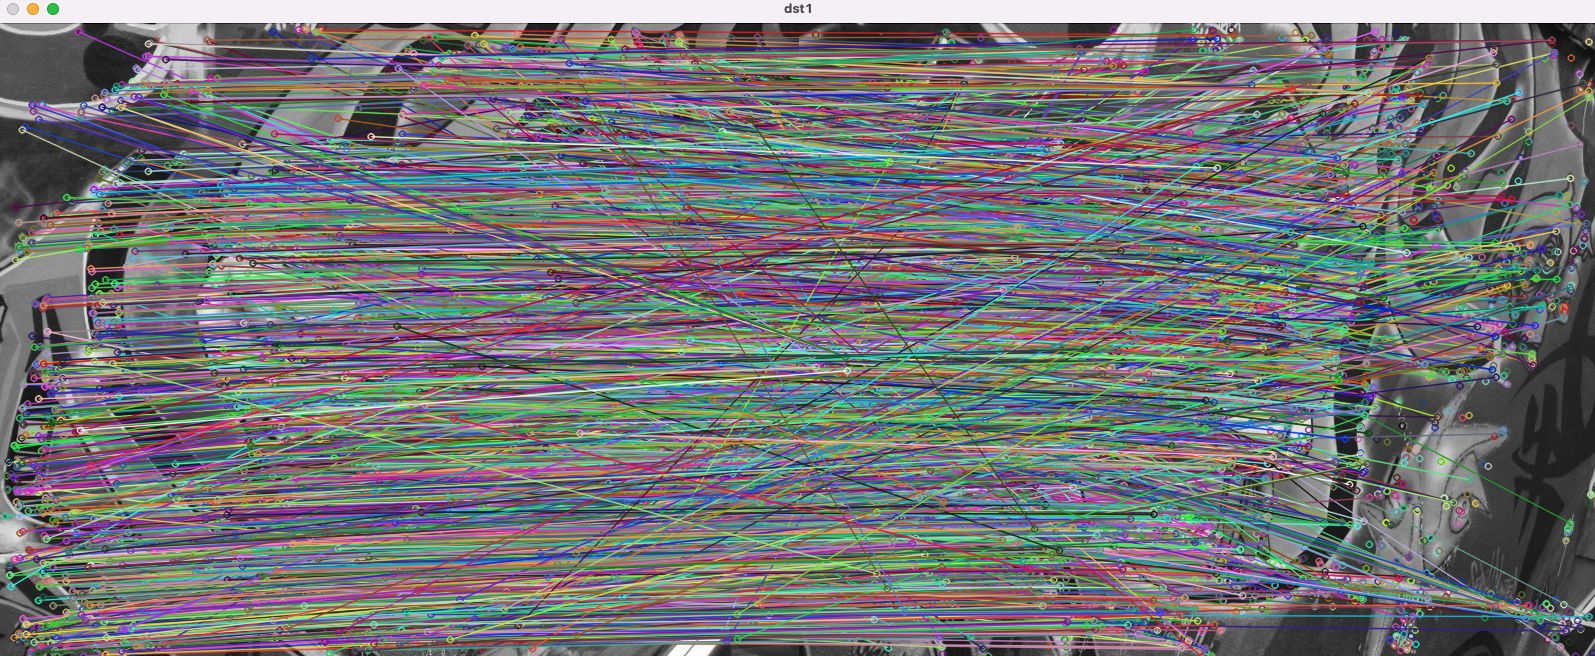
dst1 = cv2.drawMatches(src1, kp1_1, src2, kp1_2, matches1, None)
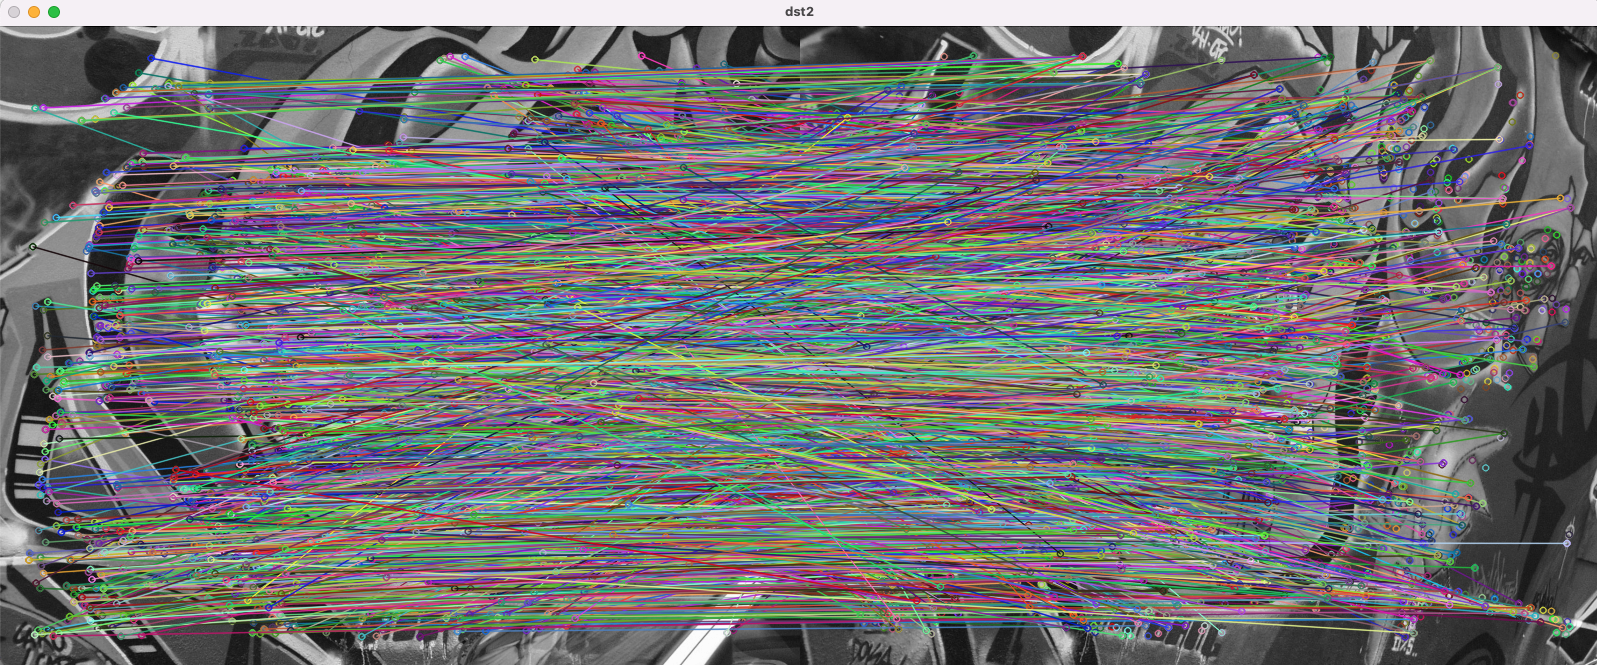
dst2 = cv2.drawMatches(src1, kp2_1, src2, kp2_2, matches2, None)
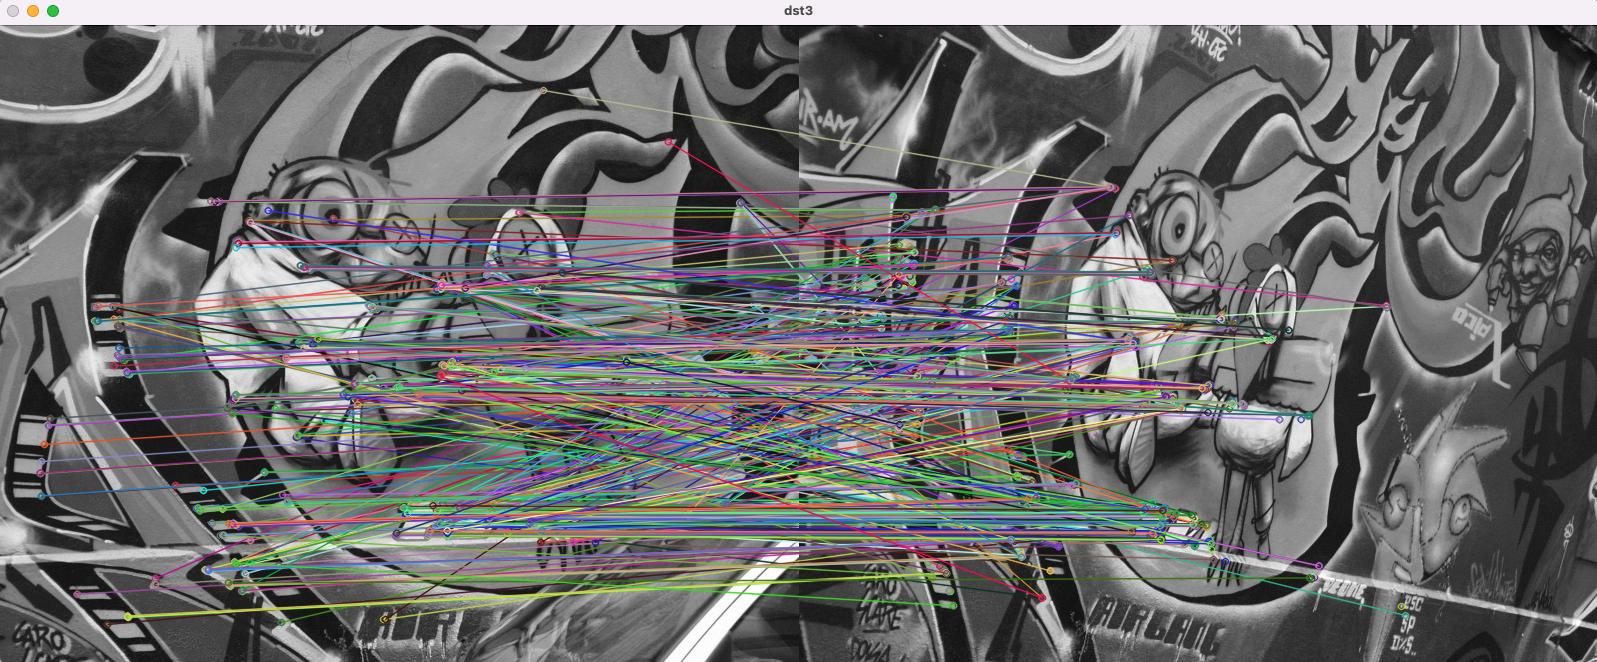
dst3 = cv2.drawMatches(src1, kp3_1, src2, kp3_2, matches3, None)
cv2.imshow('dst1', dst1)
cv2.imshow('dst2', dst2)
cv2.imshow('dst3', dst3)
cv2.waitKey()
cv2.destroyAllWindows()결과
# of kp1_1: 3159
# of kp1_2: 3625
# of matches1: 3159
# of kp2_1: 2418
# of kp2_2: 2884
# of matches2: 2418
# of kp3_1: 500
# of kp3_2: 500
# of matches2: 500
(결과를 보면 기준->대상의 매칭점이 무조건 매칭됨을 확인 가능하다. 여기서 좋은 매칭을 찾는 선정 과정이 필요하다.)